📡 What is Swarm?
Swarm is a private Nostr relay with integrated Blossom media server for teams.
Control access via your domain's .well-known/nostr.json, configure user access or custom permissions,
and sync media between relays via an embedded bouquet client. Works with any Nostr client. Includes a link to the
Curator client to help quickly check relay content and post notes. Default is badger db and filesystem for media,
but you can easily switch to a postgreSQL database and S3 storage for media.
One-shot AI Deploy
First, Sign up to the AI Dev ops platform here:

Deploy this repository https://github.com/HiveTalk/swarm and please use the zeabur-dashboard branch.

Name it MyTestRelay. Automatically assign a zeabur domain to the MyTestRelay service.

Set the following environment variables.

RELAY_NAME="MyTestRelay"
RELAY_PUBKEY="3878......"Paste into Zebur.com's AI for deploy
- Wait until Deployed. Might take a while...Once the zeabur domain name is set, make sure the **BLOSSOM_URL** environment variable is set to the zeabur domain name provisioned.
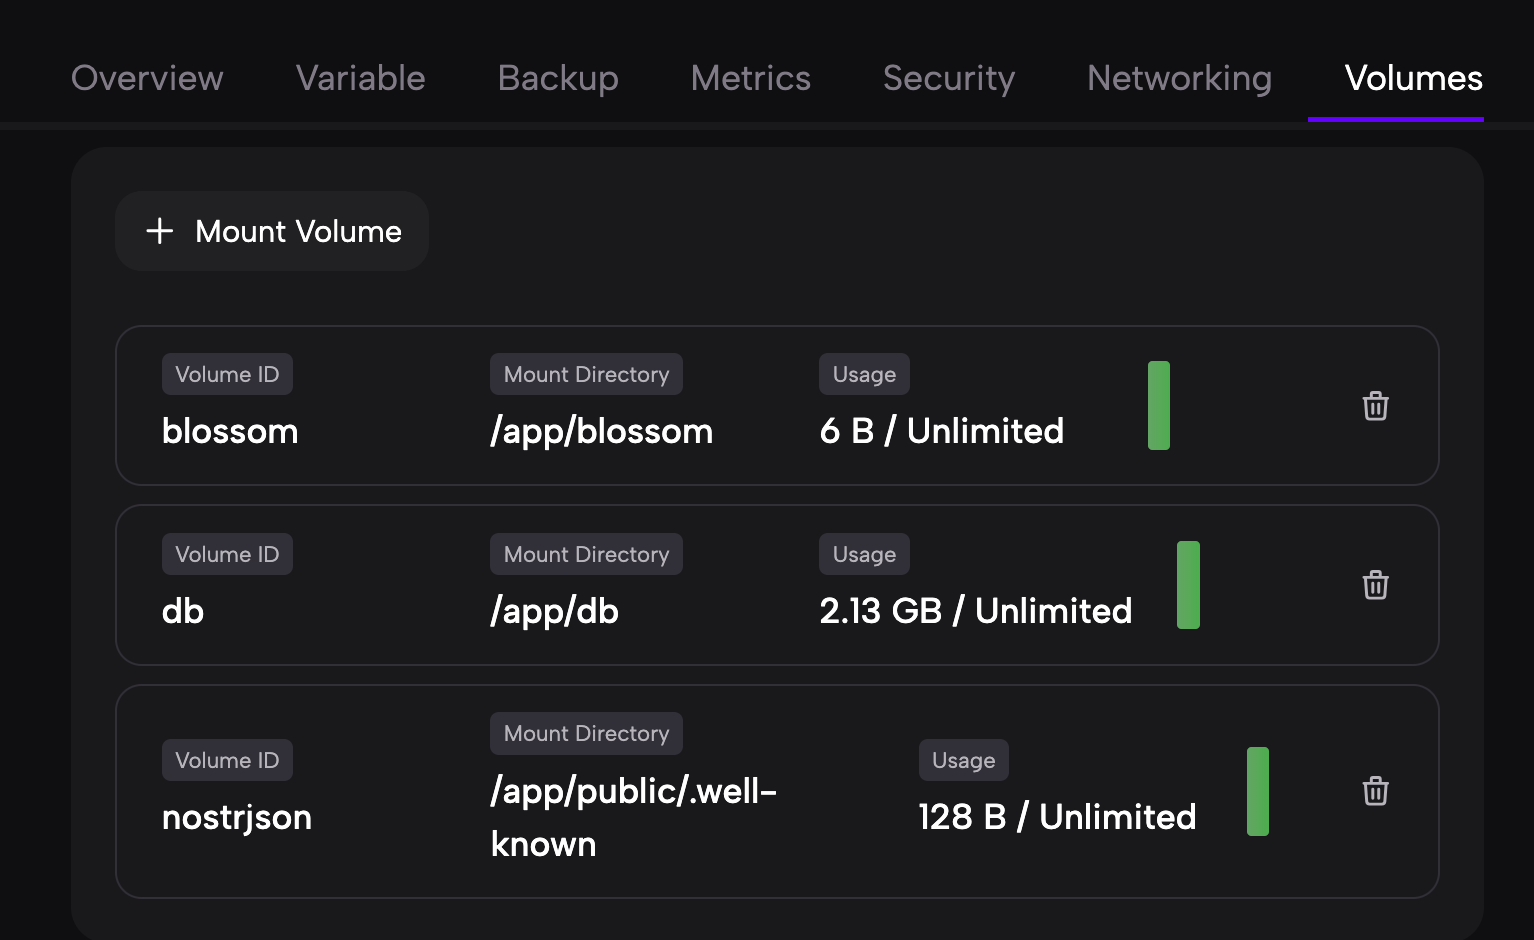
- If you want to keep using the default settings please mount these volumes, so that the data is not wiped out every time you redeploy.
- Verify your relay - Jump to Step 3 below.
💰 Zero Cost Relay
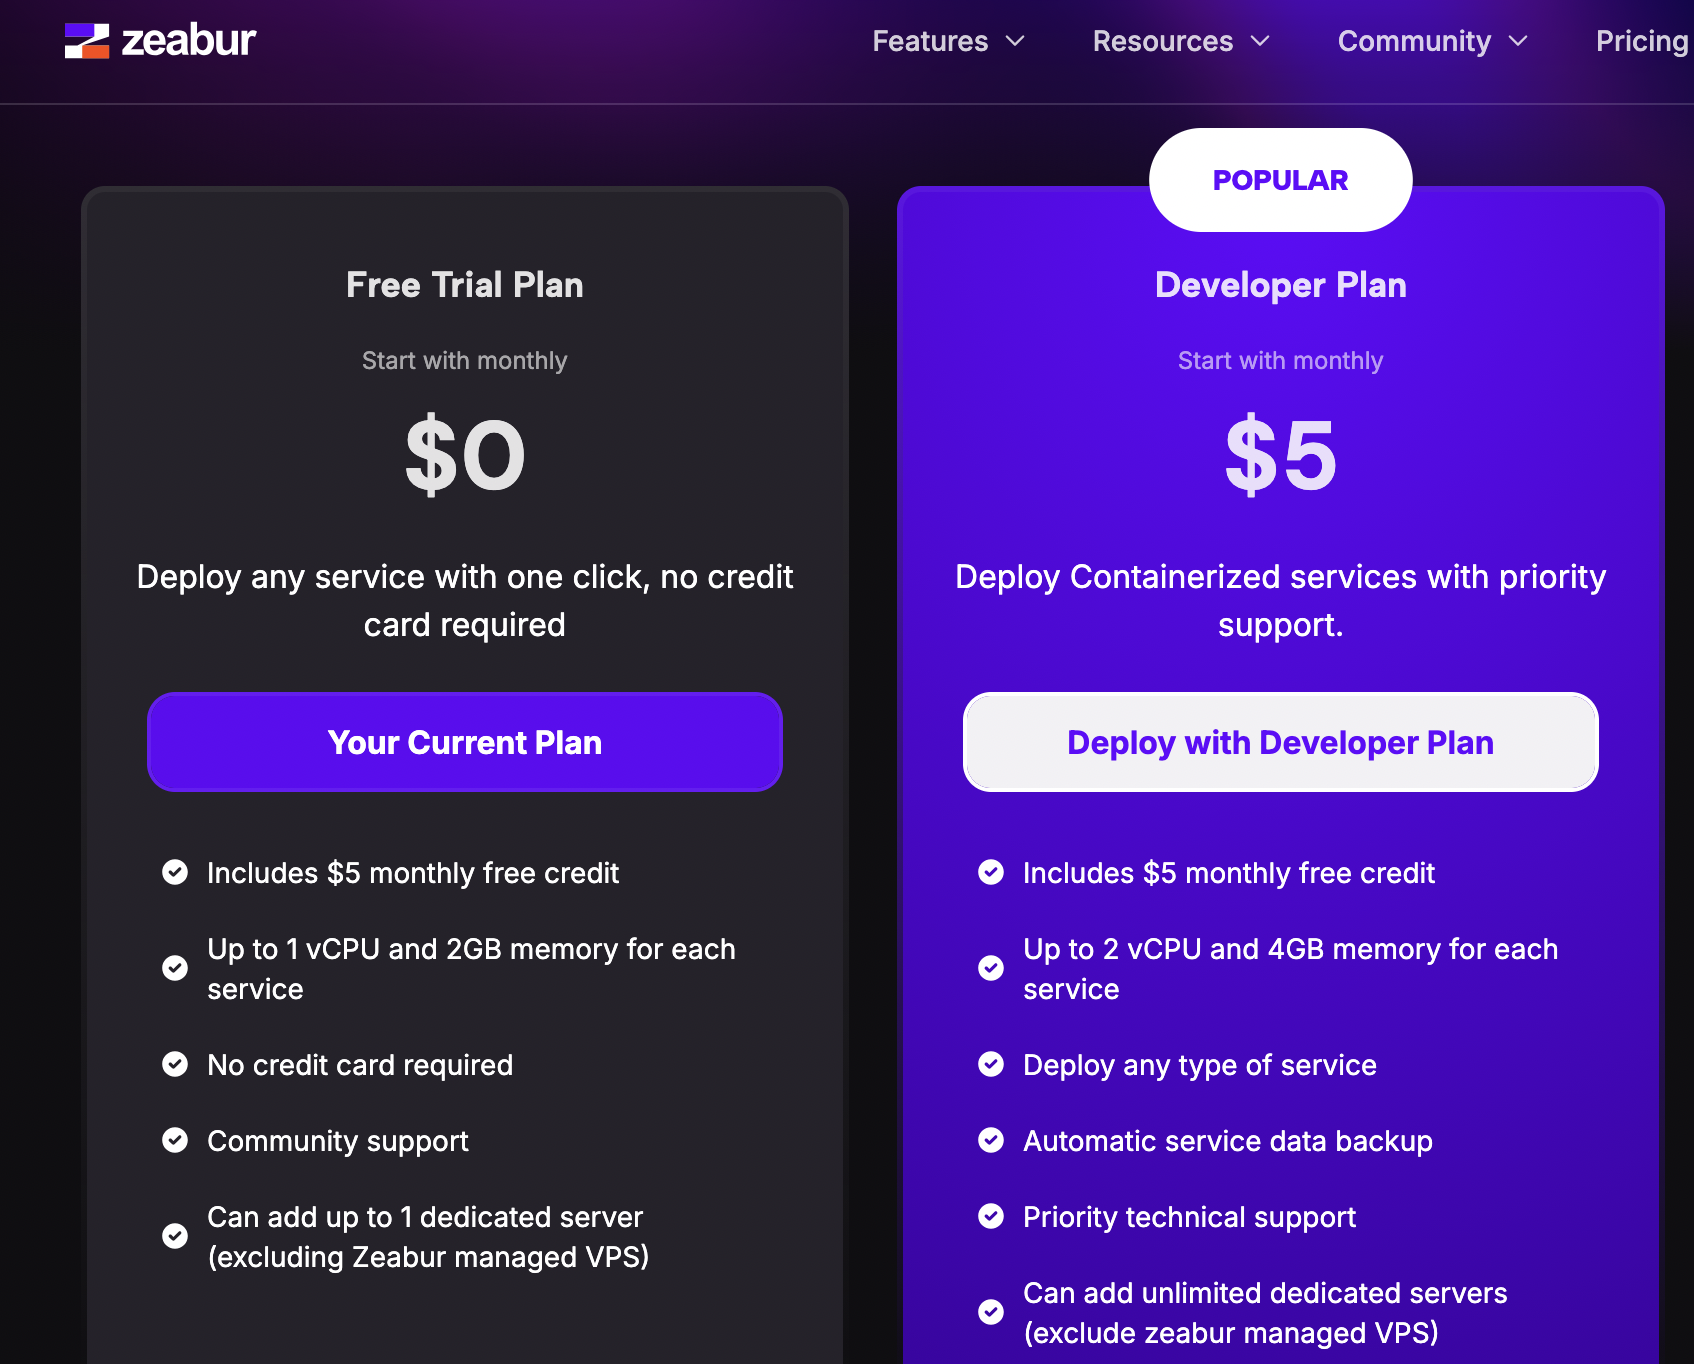
▼Running a Nostr relay doesn't have to be expensive. By leveraging the free tiers of several modern cloud platforms, you can host a fully functional Swarm relay for $0/month. This is made possible by the generous free usage limits provided by Zeabur and Tigris.
Zeabur provides a free tier that is perfect for small relays. It includes enough resources to run the Swarm container and handle initial traffic without any cost.
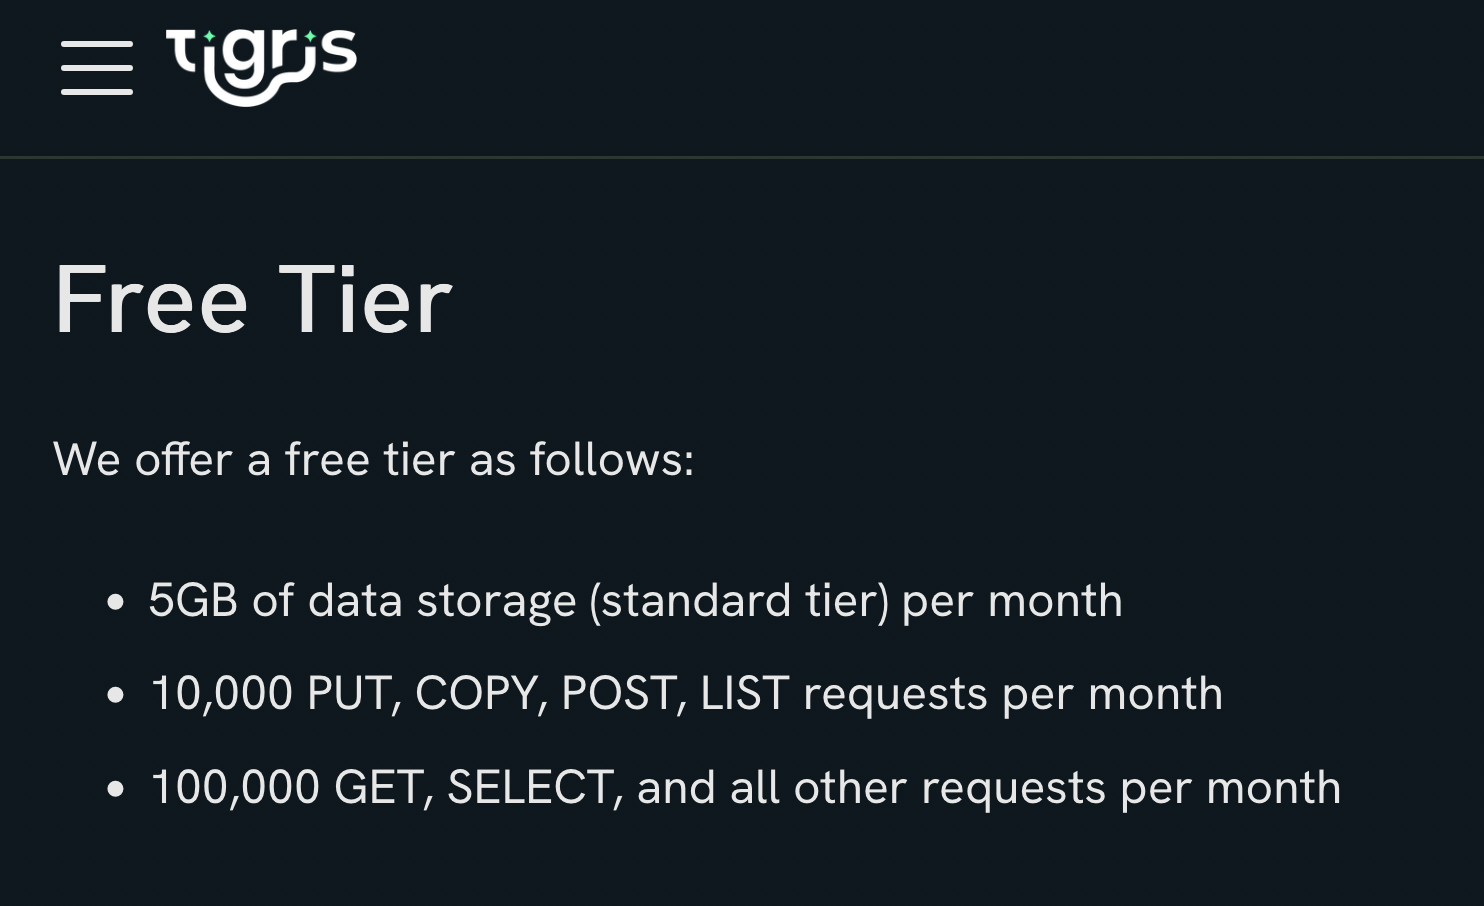
For Blossom media storage, Tigris offers an S3-compatible API with a free tier including 5GB of storage and generous transfer limits.
Manual Deployment Guide
🎯 Step 1: Initial Deployment
▼- Go to your Zeabur.com dashboard
- Click "Create New Project"
- Select "Deploy from GitHub"
- Enter repository URL:
https://github.com/HiveTalk/swarm.git - Click "Deploy" with default settings
- Wait for initial deployment to complete
⚙️ Step 2: Configure Essential Environment Variables
▼- Navigate to your Zeabur Project dashboard
- Click on your deployed service
- Go to "Variables" tab
- Add/update the following required variables:
Required Variables:
RELAY_NAME="Your Relay Name"
RELAY_PUBKEY="your_relay_public_key_here"
NPUB_DOMAIN="yourdomain.com" # optional if you have it, if not leave blank.
NPUB_DOMAIN should match your domain and reference the /.well-known/nostr.json file to indicate which users have access.
- Click "Save" or "Update" after adding variables
- Trigger a redeploy from the dashboard
You can set up a NIP-05 service either with the built in one on the relay or set up your own nip05-service repository.
Here's how to Configure nostr.json on the relay
First, set a volume for the relay to save the nostr.json file, in case we redeploy.
Setup Public Domain
You Must setup a domain for your relay to function.
- Navigate to the "Networking" tab in your service dashboard
- Verify the port is set to
3334(HTTP) - Under "Public" section, click "Generate Domain" for an automatic domain, or click "Custom Domain" to use your own
- Wait for the domain to be activated

🗄️ Optional: Database Configuration
▼Best for production use, consider upgrading from the default Badger DB:
Option A: Zeabur PostgreSQL Template (Recommended for beginners)
- In your Zeabur project, click "Add Service"
- Select "PostgreSQL" from the marketplace
- Wait for PostgreSQL to provision
- Zeabur will automatically inject database connection variables, if issues chat with Zeabur's AI assistant Also see guide for details here: ENV_CONFIG_GUIDE.md
- Redeploy your application
Option B: InsForge PostgreSQL
InsForge provides a managed PostgreSQL database that is fully compatible with the Swarm relay.
- Sign up at insforge.com
- Create a new project and provision a PostgreSQL database
- Copy the connection string from your InsForge dashboard
- Update Zeabur environment variables:
Also see guide for details here:
ENV_CONFIG_GUIDE.md
DB_ENGINE=postgres DATABASE_URL=postgres://user:pass@host:5432/db?sslmode=disable - Redeploy your application
📦 Optional: S3 Storage Configuration
▼Replace filesystem storage with S3-compatible storage for Blossom media:
Using Tigris Data
- Sign up at tigrisdata.com
- Create a new bucket
- Generate access credentials, make sure you have write access granted to the bucket
- Add S3 configuration to Zeabur environment variables: Also see guide for details here: ENV_CONFIG_GUIDE.md
# Storage (S3/Tigris)
STORAGE_BACKEND=s3
S3_ENDPOINT="https://tigris or aws url here"
S3_BUCKET=swarm-media
S3_REGION=auto
AWS_ACCESS_KEY_ID=tid_xxxxx
AWS_SECRET_ACCESS_KEY=tsec_xxxxx
# Blossom (enabled for S3)
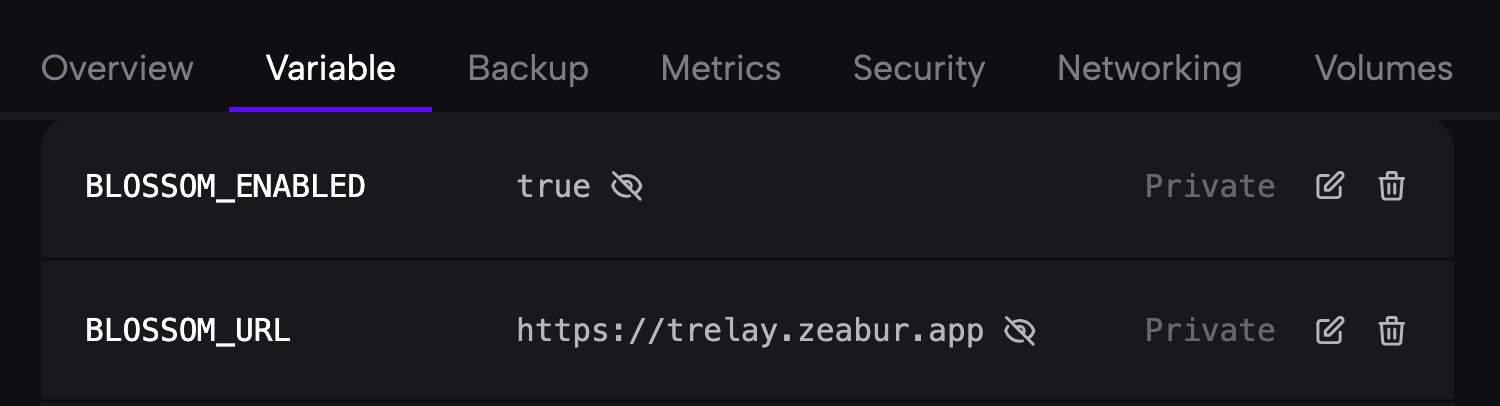
BLOSSOM_ENABLED=true
BLOSSOM_URL=https://your_url_here
- Also remember to update Blossom configuration:
BLOSSOM_ENABLED=true
BLOSSOM_URL=https://swarm123.zeabur.app (use your actual deployed URL)
- Save variables and redeploy
🔗 Useful Resources
▼🆘 Troubleshooting
▼- If deployment fails, check the logs in Zeabur dashboard
- Ensure all required environment variables are set correctly
- Verify your domain's
.well-known/nostr.jsonfile is accessible - For database connection issues, verify your DATABASE_URL format
- For S3 issues, confirm your credentials and endpoint are correct